


American Drain – Patented Components | US Patents Won: US 9,045,874 B1, US 10,519,619 B2, US 11,512,444 B2, US 11,840,819 B2
American Drain Components
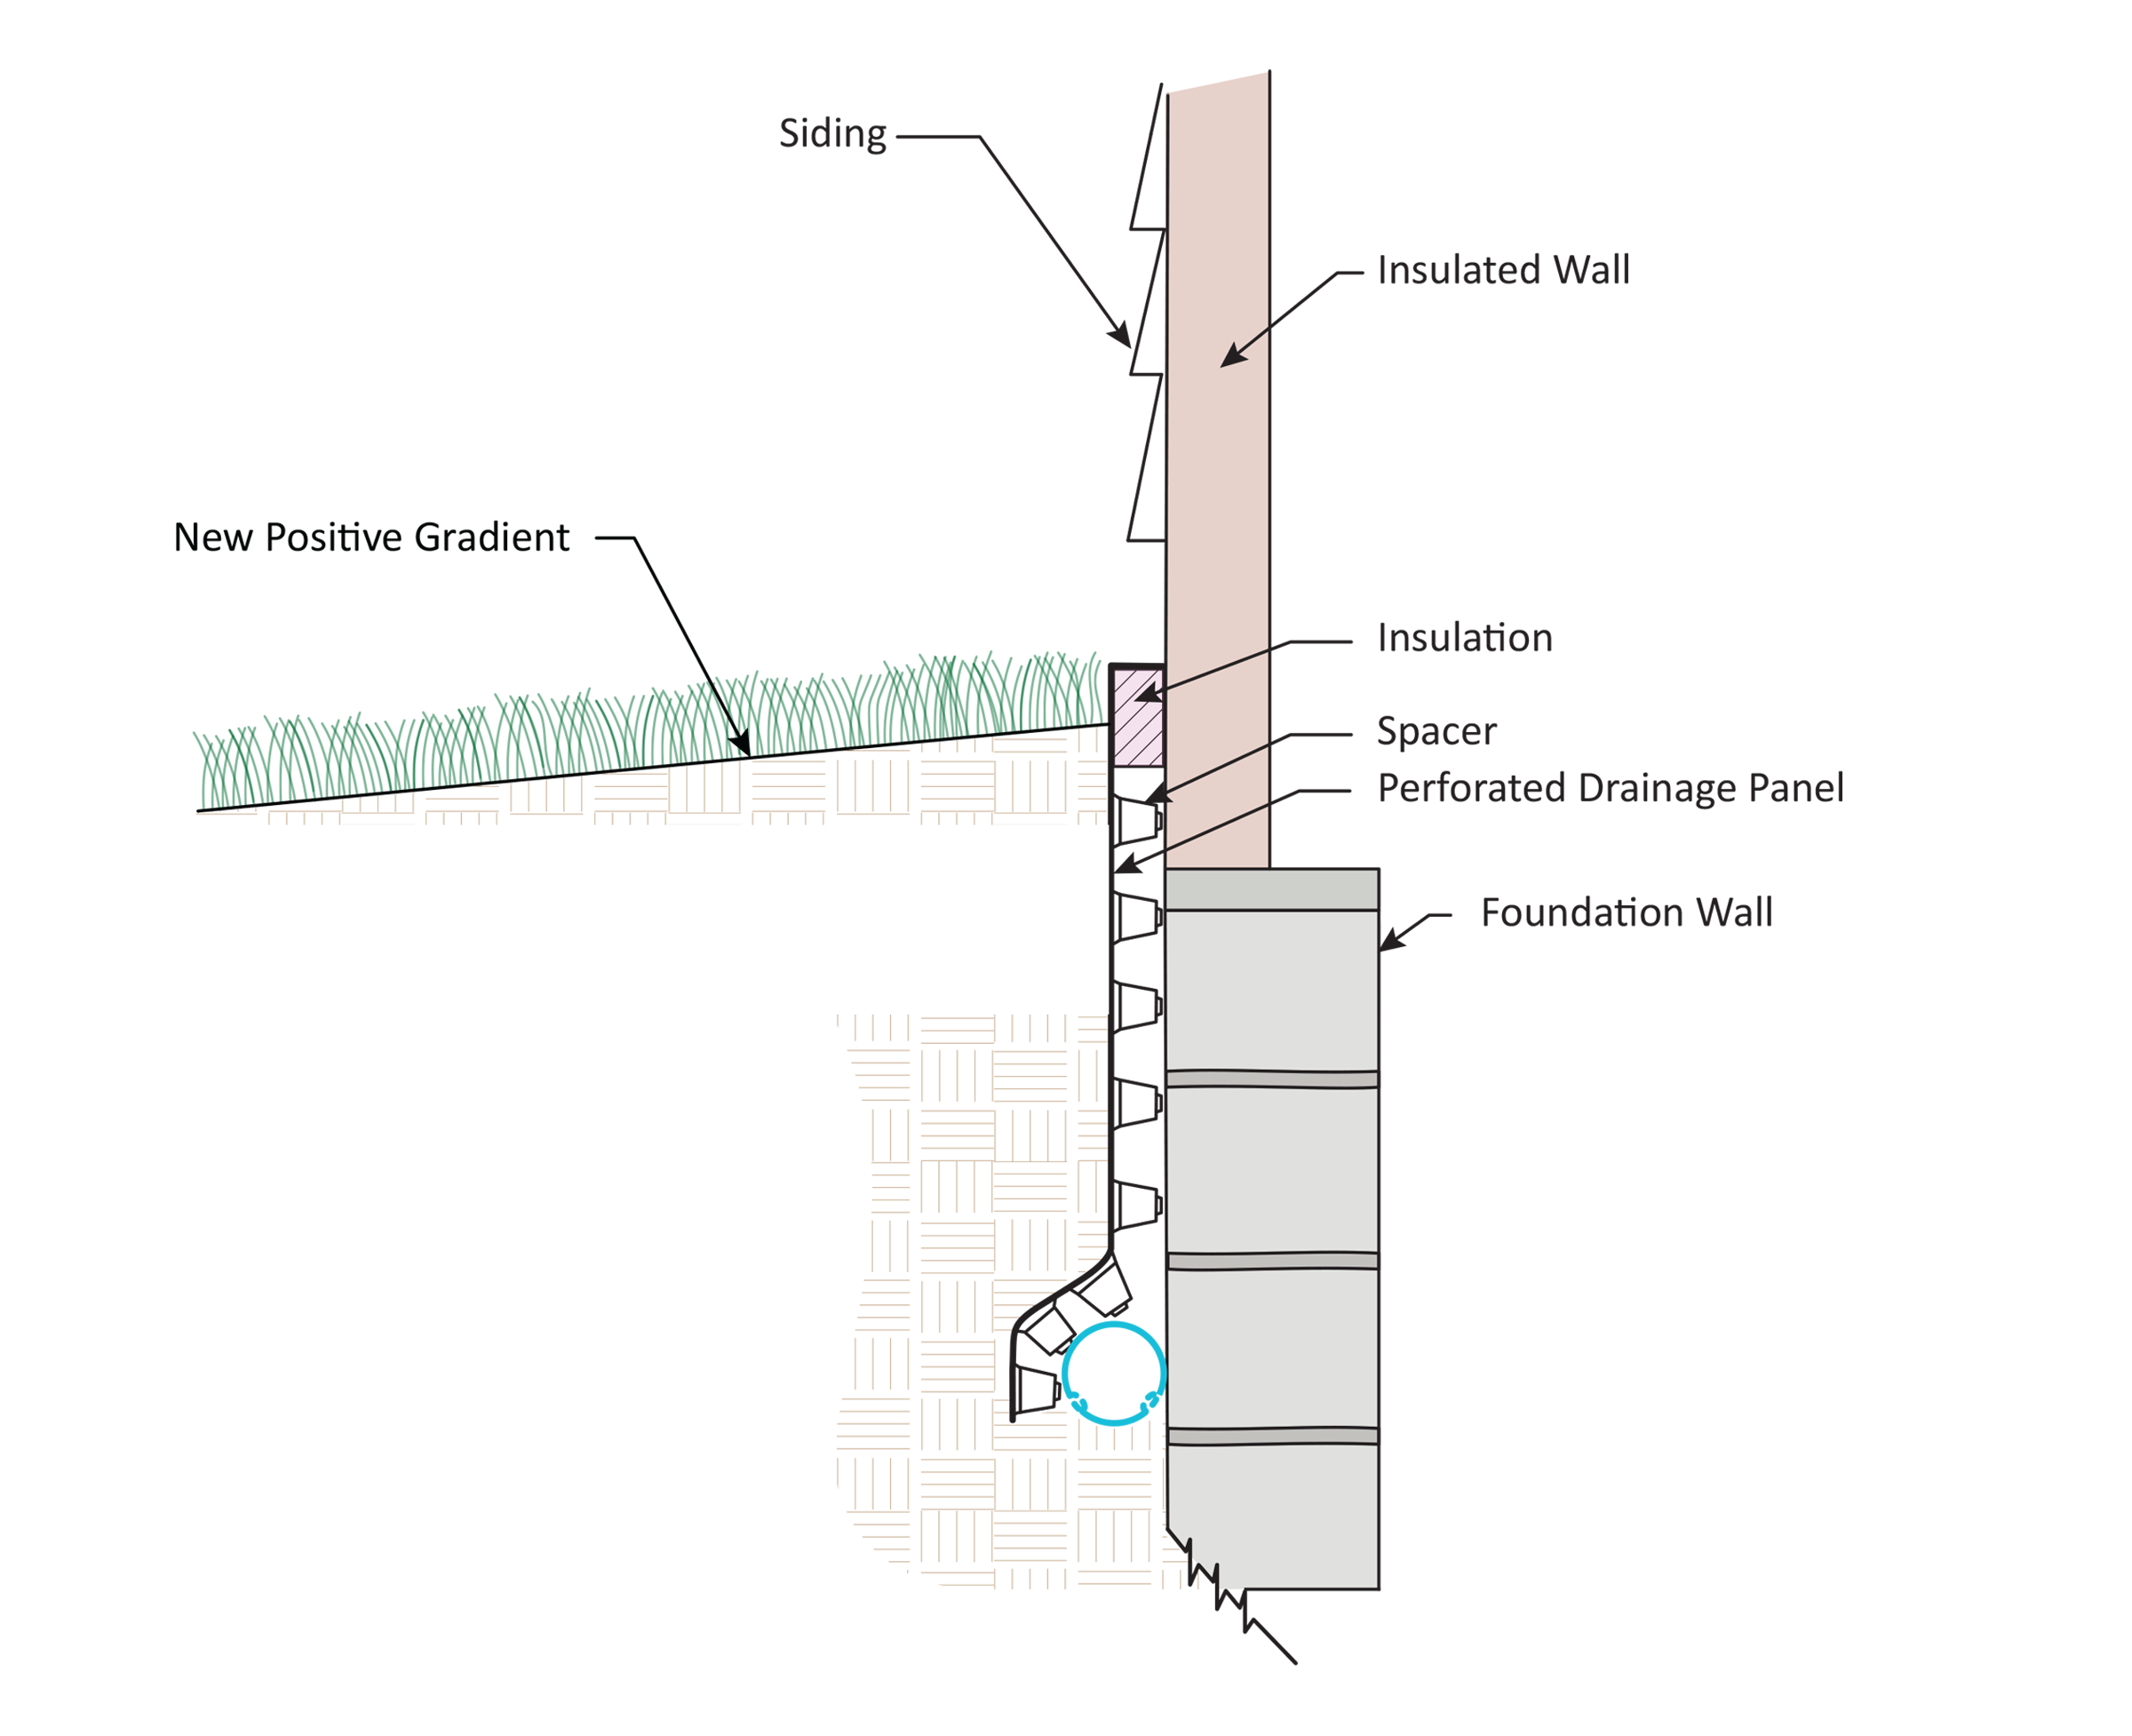
Drainage Panel, Drain Caps (Perforated & Solid), Drilled PVC Drain Pipe
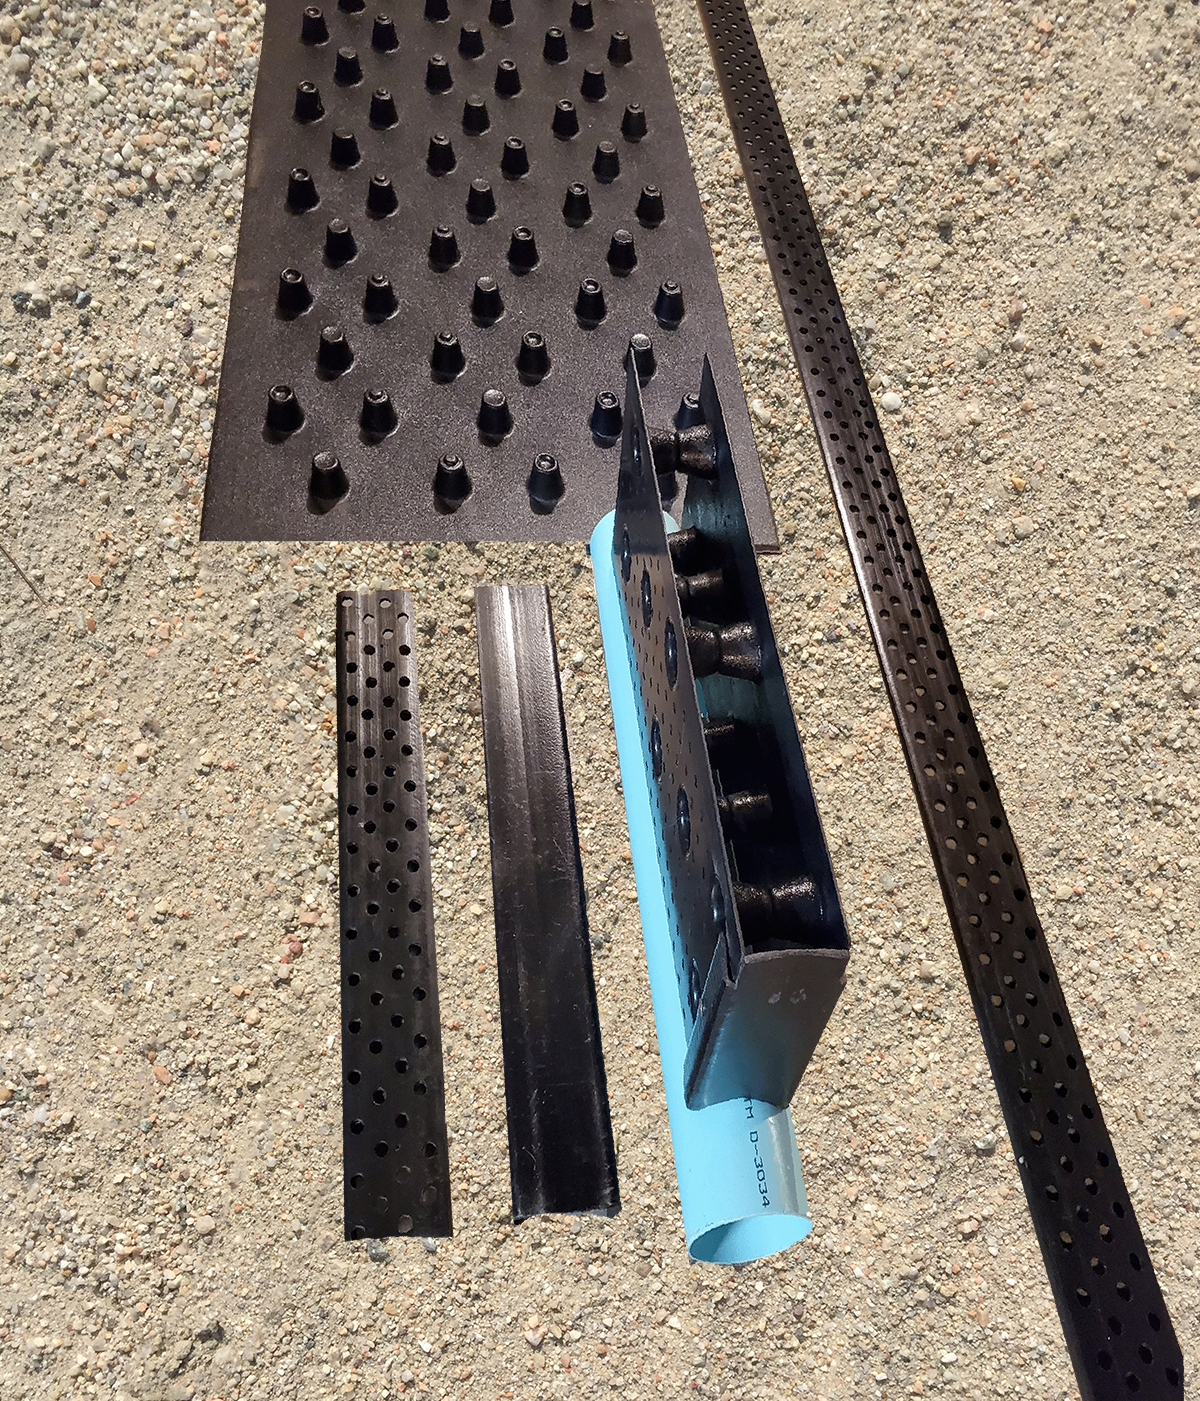
American Drain – Front & Back of Drainage Panels
2′ x 5′ Panels | 1.5″ Width Standoffs 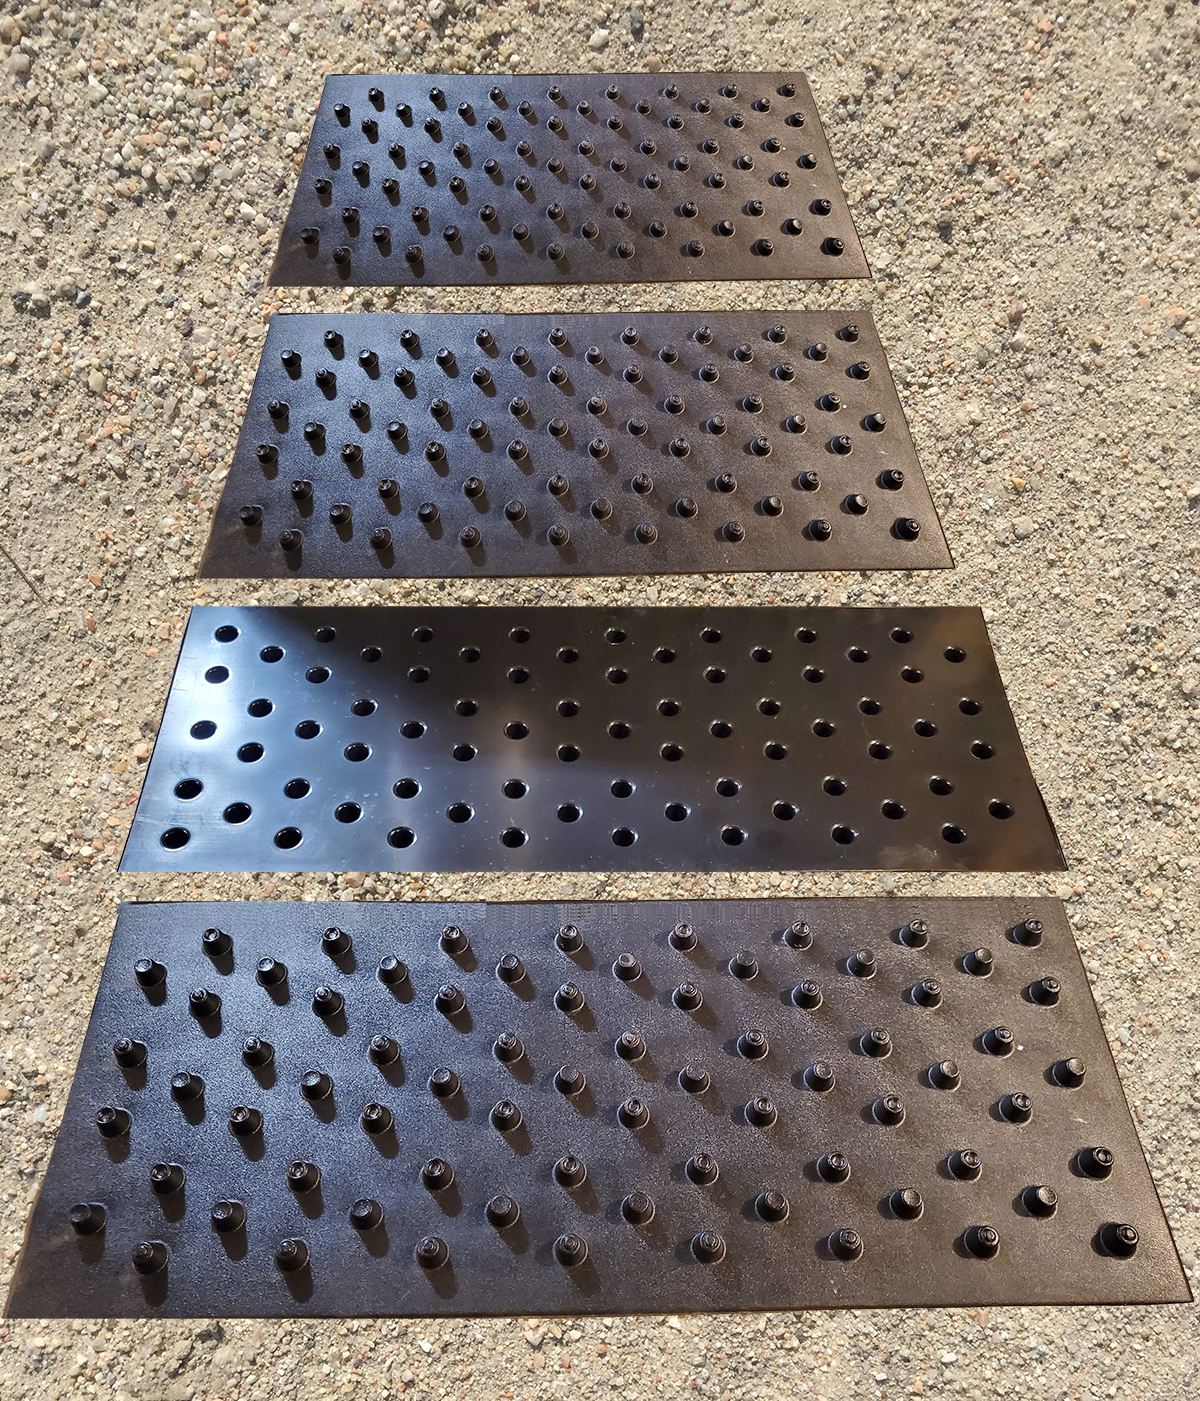
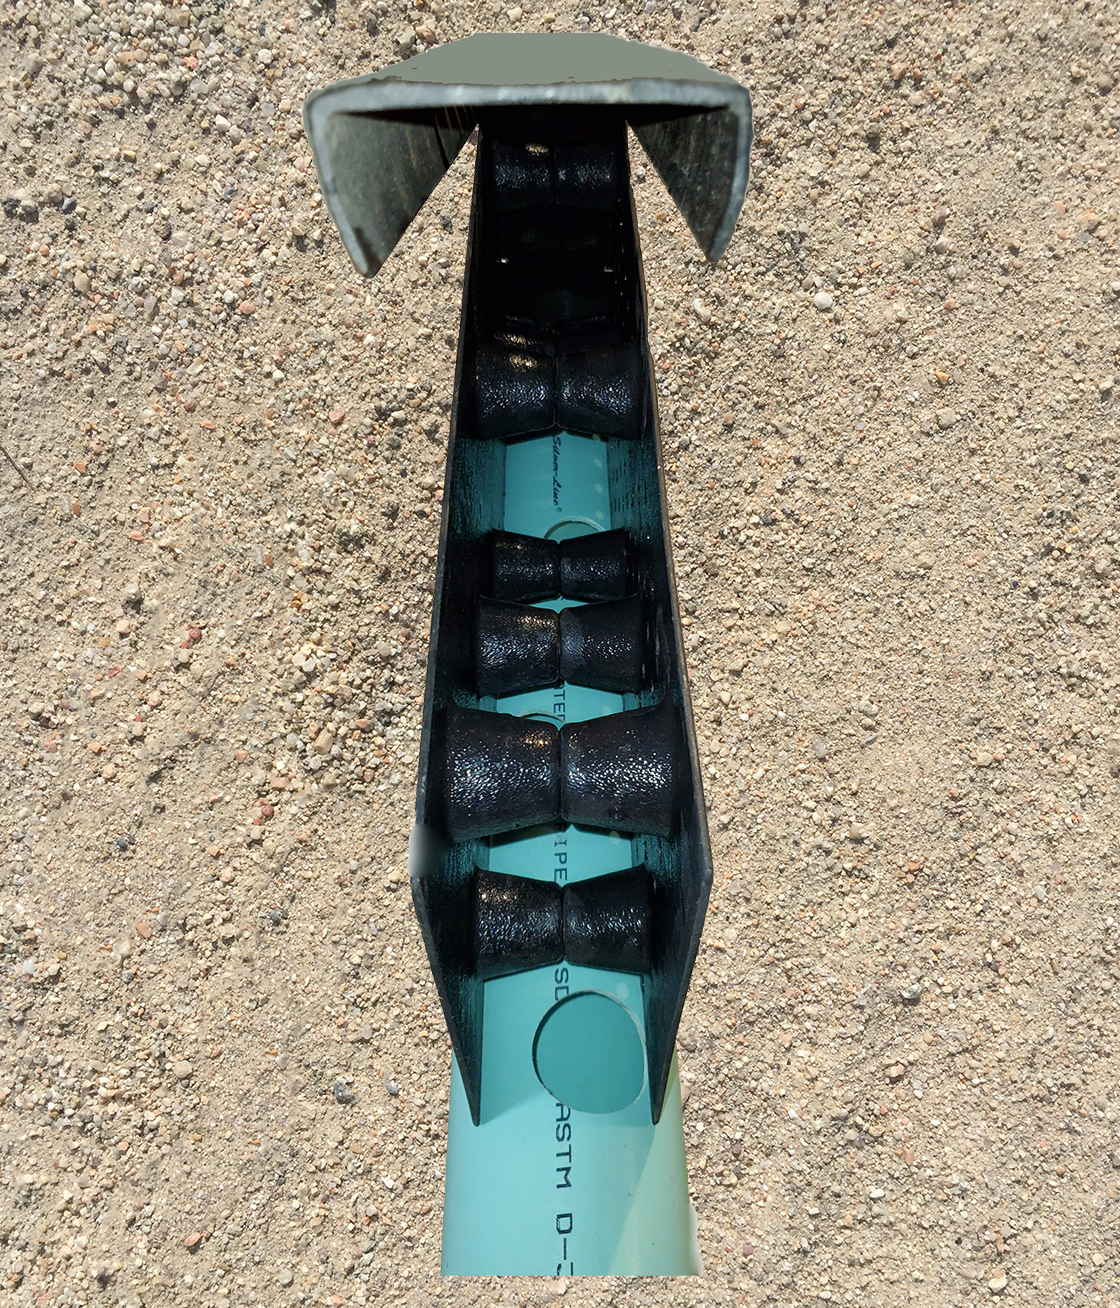
American Drain – Trench Drain Assembly
3.5″ Wide, Easily Cut & Connected to Achieve Any Length and Height
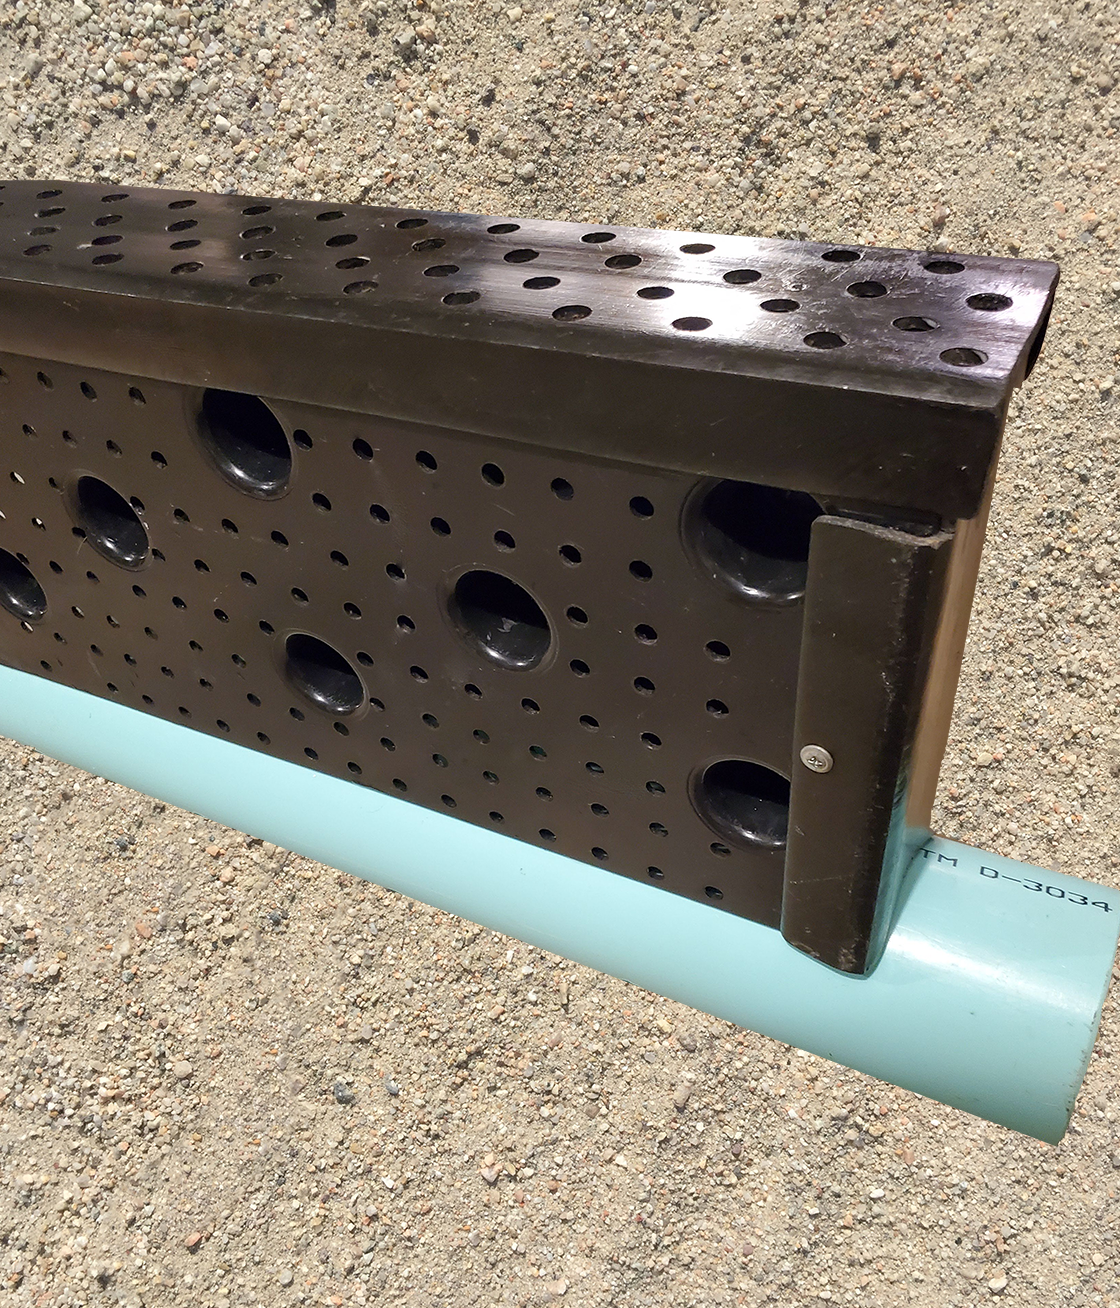
American Drain – Inside View Showing Panels Connected Face to Face w/Solid Cap On PVC Pipe w/ 1.5″ Holes
American Drain Foundation Waterproofing System Technical Specifications Rev. 12-07-21
- Materials:
-
- Drainage Panels
- Panels are constructed of ⅛” thick ABS plastic
- the panel’s measure ~28” x 65” long by ⅛” thick, 10 sq foot per panel when installed
- Panels weigh ~6.8 lbs each (3.1 Kilos)
- Drainage Panels
- 4 inch PVC SDR-35 Drainage Pipe and Fittings
- Commercial grade PVC drainage pipe is recommended. 2 rows of half inch holes should be drilled about ⅓ up from the bottom of the pipe. 1.5” holes should be drilled on top of the pipe every ~18”
- Panels can be used with of any size pipe 4” in diameter or greater, 4 inch pipe is common for most residential jobs
- Cap and Corners
- 1.5” – 2” rigid foam board insulation to be used to cap the panels off at the top (cut in strips from 6” up to 16” depending on the frost line depth in your area 4” in NC, 12” for a Northern heated basement)
- ~⅛” thick 1.5” x 1.5”, 90 degree angle strips in 6’ lengths are used for fastening corners where panels are butted together.
- Landscaping Fabric: Geotextile Drainage Fabric and 4” – 6” long landscaping staples. Fabric and staples can typically be purchased in rolls from 3’ wide up to 15’ wide by 300’ long at your local landscape supply store – woven or non-woven geotextile fabric are both sufficient].
- Drainage Sand: This is simply that will let water pass through easily such as concrete sand with larger round granules rather than sand with tight packing granules such as some mason sands and silica sands.
- Drainage Rock: Surround the panels with ¾” gravel (install a 1” layer directly under the pipe, as well as in horizontal lifts along the length of the panels (see backfilling below) along the panels while backfilling
- .75 – 1.5” long Drywall or deck type screws can be used to fasten the panels together
- 1” – 2” Tapcon screws or Hilti nails to fasten panels to the wall, about two per panel
- Optional: A root deterrent such as Bio-Barrier [$6 per square foot] is recommended in areas with extreme root systems such as willows & river birches.
- Basic Tools Required:
-
- Screw gun with proper driver bits for your screws and a ½” paddle or typical drill bit to drill drain holes
- A circular saw, table saw, grinder or Dremel Ultra saw with blades appropriate for cutting 1/8 inch thick ABS plastic panels can be used only as is specified according to the saw manufacturer’s specifications for cutting the panels
- Basic hand tools such as a hoe and shovel to move/ spread sand and gravel and ~8 five gallon buckets
- Panel Preparation and Assembly:
- Drilling: Panels can be drilled in a stack of 7 at a time, prior to assembly, using a jig to ensure straight drilling. Drainage holes in panels should be in a row vertically, ~every 5”, centered between spacers.
- Panels can be cut with any circular saw or jigsaw type tool. Circular saws with panelling blades work well. A stack of 5 at a time can be cut on a table saw. Always follow manufacturers specifications and guidelines.
- the ends of the panels can be overlapped and the panels can be screwed together At the overlaps. Panels could be secured to the wall using tapcons or Hilti type nails but will ultimately be held in place by the weight of the backfill soil
- Installation:
- Ideally, when the footer is poured, form boards should be used on the outside portion of the footer to allow an 8’ over dig so the drain pipe and panel system can start at the grade level at the bottom of the footer
- Pipe should be installed with a minimum fall of 1/2” per 10’ of pipe
- Clean out access points should be installed at corners and at least every 40’. This is a “Tee” fitting in the foundation pipe system with a capped pipe extending up to grade. This will allow access to the pipe system for cleaning an inspection.
- Pipe Holes/Apertures:
- Bottom holes: 2 rows of ½” diameter holes should be drilled along the bottom ⅓ of the pipe spaced approximately 10” apart to allow water to rise up into the holes and carried away by the solid trough at the bottom of the pipe. Holes should face down onto the 1” bed of gravel to collect ground seepage as it rises up.
- Top Holes: 1.5 inch diameter holes should also be drilled every 18in along the top of the pipe to allow for inspection, access/cleaning and high-volume water flow as a backup in case the bottom holes were to become clogged.
- Backfilling:
Once the ~1” of sand, the Filter Fabric, the ~1-2” of gravel and at least the first set of drainage panels are installed along the bottom of the footer Then you are ready to begin backfilling.
- Start by spreading an inch of gravel along the length of the footer for the first 8 to 12 in height of panels.
- Next, fold the Filter Fabric over the gravel end clamp the fabric to the top of the panels with hand clamps
- Next you begin to backfill ~16” high with dirt
- Next you unclamp the fabric and spread ~1 Five gallon bucket of gravel per 8’ linear of wall. See you then cut on the fabric to allow it to settle down in between the panels and the fabric. You repeat this step in 16 in lifts until the wall is backfilled to the top of the panels.
- After the wall is backfilled approximately to the top of the panels, trim the fabric as needed and tuck the fabric into the top of the panels, then insert the rigid foam insulation strips. These act as a cap for the panels.
- Sod or mulch can be placed right over the top of the insulation but it is preferable to have a row of pavers (such as 12 x 12 or larger) against the house as a bug barrier.
- Maintenance:
It is recommended that you simply run a hose into the the farthest cleanouts from the outlet portion of the system at least once every two years to ensure that water that gets into the system is coming out the other end. If there is ever an issue on the inside of the wall such as a damp spot then you can easily dig down an inch or two and then remove a piece of the insulation so that you can look down into the space between the panels and the wall and see what’s going on. The amount of water that goes into the system should be the same amount as you see coming out the outlet end.